
When you play Valorant, every fraction of a second and every tiny movement counts. Have you ever felt like your crosshair just isn’t moving how you want it, or that your aim lags behind your reflexes?
The truth is, Valorant sensitivity and settings are more than just numbers. They are the bridge between your hand and the game. When configured right, your mouse becomes an extension of your hand, making every shot feel precise and natural.
In this guide, we’ll take you step by step through everything you need to know about finding the best Valorant Sensitivity, understanding eDPI, testing your setup, and learning from professional players to boost your gameplay in 2025.
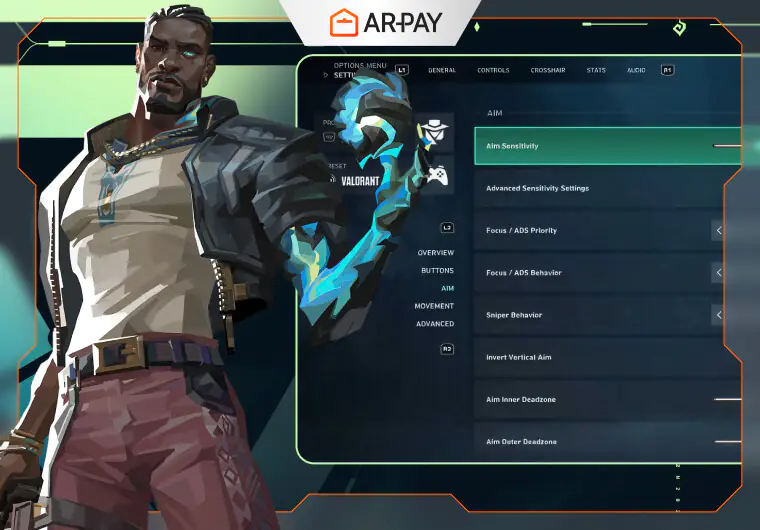
How Valorant Sensitivity Works
Understanding your mouse sensitivity in Valorant is one of the first steps to improving your aim. Sensitivity affects how fast your crosshair moves when you move your mouse.
- Too high: Your aim may feel shaky and hard to control.
- Too low: You might struggle to react quickly to enemies.
But in-game sensitivity alone doesn’t give the full picture. To truly understand your aim, you also need to consider DPI, which measures how sensitive your mouse is at the hardware level.
What Is DPI and eDPI?
DPI (Dots Per Inch)
- Measures how far your cursor moves on screen for each inch you move your mouse.
- Higher DPI = faster cursor movement with less hand motion.
eDPI (Effective DPI)
- Combines your in-game sensitivity and your mouse DPI to give the true feel of your aim.
- Formula: eDPI = In-Game Sensitivity × DPI
Example:
- DPI: 800 × Sensitivity: 0.40 = eDPI 320
This value helps you compare your setup with other players more accurately, making it easier to find what feels right for you.
Common eDPI Values
- Pro players: Usually play with eDPI between 200 – 400.
- Beginners: A good starting point is DPI 800 × Sensitivity 0.35 = eDPI 280, offering better control.
- Typical ranges:
- In-game sensitivity: 0.30–0.75
- DPI: 400–1600
The key is to experiment within these ranges until your movements feel natural.
Ready to take your Valorant experience to the next level? Grab your Valorant USA Gift Card from ARPay today and unlock skins, agents, and in-game content instantly!
How to Find Your Ideal Valorant Sensitivity
Finding the perfect Valorant Sensitivity is about balancing control with speed. The right setup makes aiming feel natural, while the wrong one can leave you frustrated. Here’s a simple approach to get it right.
Start with Pro Player Valorant Settings but Make Them Your Own
Professional players’ settings are a good starting point to master Valorant strategies and tactics, but they won’t suit everyone.
- Begin with pro values to get a reference.
- Adjust slightly based on your desk space and hand movements.
- Comfort is key. Your aim should feel like a natural extension of your hand, not forced.
Test Your Valorant Sensitivity Step by Step

Experimenting in a controlled way is the best way to find what works:
- Practice Range: Spend time in Valorant’s training mode with bots to feel your aim.
- Aim Trainers: Tools like Kovaak’s FPS Aim Trainer or Aim Lab help refine precision.
- Small Tweaks: Adjust sensitivity in small steps, around ±0.05, until movements feel smooth.
- Real Matches: Practice alone isn’t enough. Try Deathmatch or Competitive games to see how your settings hold up under pressure.
The 360° Turn Test
A practical trick to check if your Valorant Sensitivity is balanced is the “360 test”:
- Move your mouse fully to turn your Valorant characters 360° in-game.
- Ideal range: 25–35 cm for a full turn on your mousepad.
- Too much distance: Your sensitivity might be too low.
- Too little distance: Sensitivity could be too high.
This simple test ensures your aim is fast enough for reaction shots but precise enough for controlled targeting.
Recommended Valorant Settings Beyond Sensitivity
Proper Valorant sensitivity is just part of the setup. These extra settings help you play smoother and react faster especially when a new update of the Valorant game is on the corner.
Mouse Settings
- DPI: 400–800 works well for most players.
- Polling Rate: 1000 Hz for responsive movements.
- Mouse Acceleration: Turn it off in Windows to ensure consistent aim.
Video Settings
- Display Mode: Fullscreen for stable performance.
- Resolution: 1920×1080 is optimal; reduce it if you need higher FPS.
- Graphics: Lower shadows and post-processing for clearer visuals.
- V-Sync: Turn off to reduce input lag.
- NVIDIA Reflex: Enable if your system supports it to improve response time.
Crosshair Settings
- Static Crosshair: Keeps aim consistent.
- Avoid Animations: Skip fading or moving crosshairs.
- Color: Green, Cyan, or White ensures visibility on any map.
Audio & Minimap Settings
- Sound: Steps and reloads should be loud; ambient noises lower.
- Minimap: Keep it fixed and enable vision cones to track teammates.
Upgrade your Valorant setup instantly with ARPay! Choose a Valorant USA Gift Card from 5 USD to 50 USD and get access to exclusive skins, agents, and in-game content today.
Pro Player Valorant Sensitivity Examples (2025 Update)

TenZ
- DPI: 800
- Sensitivity: 0.485
- eDPI: 388
- Mouse: Finalmouse Starlight
- Style: Flick aim
Derke
- DPI: 400
- Sensitivity: 0.78
- eDPI: 312
- Mouse: Vaxee Zygen NP-01
- Style: Hybrid
Aspas
- DPI: 800
- Sensitivity: 0.32
- eDPI: 256
- Mouse: Logitech G Pro X
- Style: Tracking
cNed
- DPI: 800
- Sensitivity: 0.28
- eDPI: 224
- Mouse: Razer Viper Mini
- Style: Flick aim
Key takeaway: Use these settings as a starting point. Adjust slightly around these numbers until it feels natural for you.
Tips to Master Your Aim & Valorant Settings
Mastering your aim in Valorant isn’t about copying pros, it’s about building habits that make your crosshair movement natural and reliable. Here’s how to improve step by step:
Practice Daily with Your Valorant Settings
Consistency is key. Stick with the sensitivity and settings you’ve chosen for at least a few weeks. Regular practice helps your hand and eyes sync up, turning movements into muscle memory.
Warm Up Before Every Match
Spending 10–15 minutes in Practice Range or an aim trainer like Kovaak’s FPS or Aim Lab prepares your reflexes. Warm-ups improve reaction time and accuracy before entering real matches.
Record and Review Your Gameplay
Recording your matches allows you to spot weaknesses:
- Check crosshair placement. Are you aiming at head level consistently?
- Track reaction time. How fast do you respond to enemies?
- Adjust small aspects of your sensitivity or settings based on what you observe.
This process helps you make informed tweaks instead of guessing.
Reassess Valorant Settings After Hardware Changes
Upgrading your mouse, mousepad, or monitor can affect how your aim feels. Whenever you change gear, retest your Valorant Settings to ensure control remains smooth.
Conclusion
Finding the right Valorant sensitivity and settings is a personal journey. It’s not about copying pros perfectly, it’s about discovering what feels comfortable for your hand, your desk, and your playstyle.
Remember these key points:
- Start simple: Use a baseline sensitivity and DPI, then make gradual adjustments.
- Practice smart: Warm up in the Practice Range, aim trainers, or Deathmatch before competitive games.
- Observe and adjust: Record your gameplay and notice patterns in your aim and movement.
- Stay consistent: Stick to your chosen setup long enough to build true muscle memory.
With patience and daily practice, aiming accurately and reacting quickly will start to feel natural. Each match becomes an opportunity to improve, giving you more confidence, better control, and more fun.
Take charge of your aim today, fine-tune your settings, and turn every round into a chance to sharpen your skills. Valorant is not only about reaction speed, it’s about precision, consistency, and the satisfaction of seeing your improvement in every match.
Level up your gaming experience with ARPay Gift Cards! Grab your card today and enjoy seamless access to in-game content, credits, and exclusive rewards across your favorite games.
FAQ
What is the best sensitivity for Valorant?
There’s no single “best” sensitivity. Most professional players use eDPI between 200–400, but your comfort is more important. Start with DPI 800 × Sensitivity 0.35 (eDPI 280) and adjust slightly until aiming feels natural.
How do I calculate eDPI in Valorant?
eDPI = In-Game Sensitivity × DPI.
Example: DPI 800 × Sensitivity 0.40 → eDPI 320.
This helps you compare your settings with pros and find what works best for you.
Should I copy pro player settings?
Pro settings can be a useful starting point, but they aren’t perfect for everyone. Adjust slightly based on your desk size, hand movements, and personal comfort. Your aim should feel natural, not forced.
How do I test my Valorant sensitivity?
- Use Practice Range to get a feel for your aim.
- Use aim trainers like Kovaak’s or Aim Lab for precision.
- Try the 360° turn test: your mouse should move 25–35 cm for a full in-game rotation.
- Test in real matches like Deathmatch or Competitive to see how it performs under pressure.
What DPI should I use for Valorant?
Most players use 400–800 DPI. Lower DPI offers more precise control, while higher DPI lets you turn faster with less hand movement. Pair DPI with in-game sensitivity for your ideal eDPI.
How do I improve my aim in Valorant?
- Daily practice: Stick with your chosen settings.
- Warm-up: Spend 10–15 minutes in Practice Range or aim trainers before matches.
- Record matches: Review crosshair placement and reaction times.
- Adjust settings gradually: Small tweaks make a big difference over time.
Should I change sensitivity after changing my mouse or monitor?
Yes. Different gear can affect aim feel. Always retest your sensitivity after upgrading your mouse, mousepad, or monitor to maintain consistency.
What crosshair is best for beginners?
- Use a static crosshair (no movement or fading).
- Colors like green, cyan, or white are most visible.
- Avoid fancy animations—they can distract and reduce accuracy.
Does video settings affect aim in Valorant?
Yes. Lowering graphics like shadows and post-processing can increase FPS and reduce input lag. Always play in fullscreen mode, disable V-Sync, and enable NVIDIA Reflex if available.
How do I know if my sensitivity is too high or low?
- Too high: Your aim feels shaky, hard to control, and overshoots targets.
- Too low: You move slowly, struggle to track enemies, and can’t turn quickly.
Use the 360° test to find a balanced sensitivity.

Maggi
A content writer who specializes in the entertainment field, developing entertaining and interactive content that resonates with the culture of this field. I keep abreast of current trends, especially in the world of games, movies and shopping.

